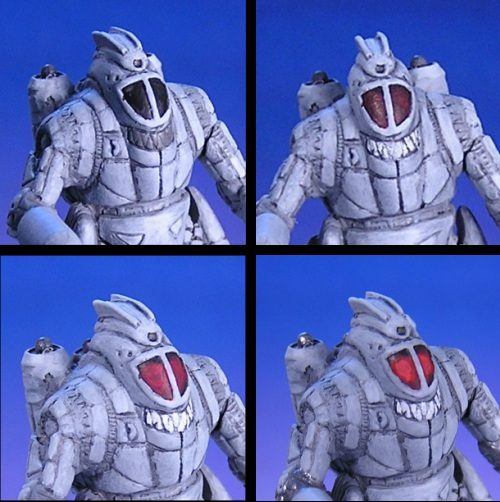
Next, I painted the "face" of the mini. Aside from the cockpit, there is a detailed area below that looks like teeth. The base coat for the cockpit is black and the teeth get VMC Gray Green (upper left). Note the smudge on the right side of the cockpit frame (I'll fix it later). Next, a coat of GW Scab Red on the cockpit, and thinned Ghost White on the teeth (upper right). Then, 2 thin coats of GW Red Gore on the cockpit, and highlighting with Delta White on the teeth (lower left). Finally, I touched up the cockpit frame and highlighted the glass with GW Blood Red (lower right).

The Spector has 7 jump jets in the game, and thus has a huge exhaust port on the torso. Though it's not a focus of the mini, I felt it deserved some attention. From left to right below, I painted it with GW Chainmail, applied a wash of GW Black Ink, and highlighted with TMM Rust and GW Mithril Silver to give a worn, corroded look. Later, I added some carbon scoring but you won't be able to see it until the final pictures.

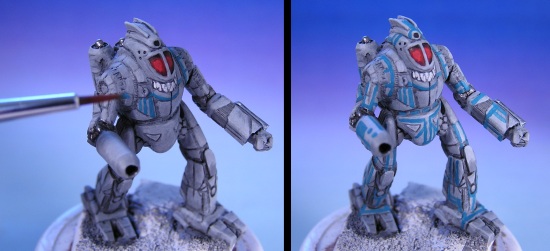
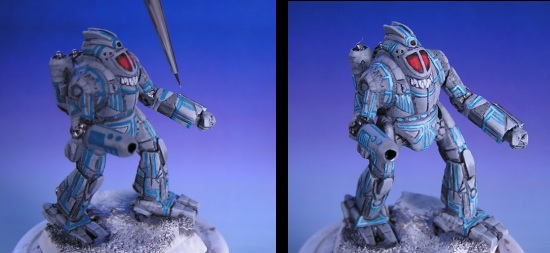
Finally, it's time for the main event: the blue lines that define a Tron-inspired Blue Program. Looking back at my still from the beginning of the article, it's clear that there are lots of lines and they are symmetric in general, but a little asymmetric on the torso. I decided to keep with that general pattern. The lines were painted in Reaper Astral Blue using a steady hand and a #000 paint brush.

The next two steps were done with a #10/0 paint brush. The first was an overcoat on all the Astral Blue lines with a mix of Astral Blue and Delta Carribean Blue. Then I did some spot highlighting near the corners of the lines with pure Carribean Blue (which is fitting, since I sometimes rock out to Enya while painting. Obscure Enya reference, anyone?). After the blue lines were done, I touched up the joints with silver and completed the miscellaneous details such as jewelling the tiny lenses of the guns on the left arm.

Page 1: Starting | Page 2: Assembly | Page 3: Painting | Page 4: Detailing | Page 5: Basing