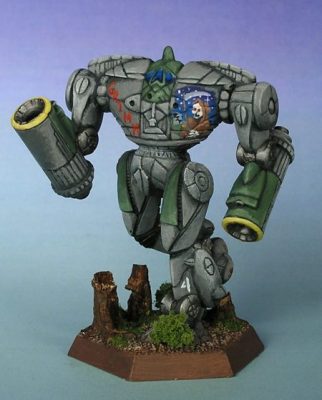

This tutorial is an article I wrote as part of the Last Painter Standing II contest on The Miniatures Page [TMP] in May 2006.
"Colin Grimm looked down at his chronometer as he plodded across the wooded countryside in the cockpit of his Emperor assault Mech. His four-hour journey to the target zone was nearly complete; the boredom of the radio silence and amber cockpit lighting would soon give way to the heart-stopping action of combat. There had been no artillery thus far, a sure sign that the approach of the mercenary forces had gone undetected. Grimm glanced out the cockpit window, noting that the other assault Mechs making up the Heavy Bombardment Group had begun to spread out their formation in anticipation of the inevitable. As the group crested a rise scattered with fallen timber, Grimm caught sight of the objective: an enemy troop concentration forming up for another sortie. The enemy Mechs began to scatter at the sight of Grimm and the reaper painted on the nose of his machine; he dropped the crosshairs onto the nearest target and muttered "Bombs Away..."
Hello again, and welcome to my next tutorial. This time, I'll be doing a custom gray and green paint scheme with Nose Art prominently featured on the Mech. I decided to invent a paint scheme for the fictitious merc unit "The Heavy Bombardment Group", taking inspiration from B-17 and B-25 bombers from WW2. A common paint scheme from the era was light gray or silver, with greenish patches around the cockpit and engine nacelles to cut down on glare for the pilot. Colorful markings would identify the unit for other bombers in the formation. Below are a few pictures I used for inspiration.

I chose to use the Emperor mini for this project. It's relatively big and bomber-like, and the arm guns reminded me a lot of engine nacelles. One problem with the stock mini is that it is very static: it comes standing at attention with only the lower arms to attach.
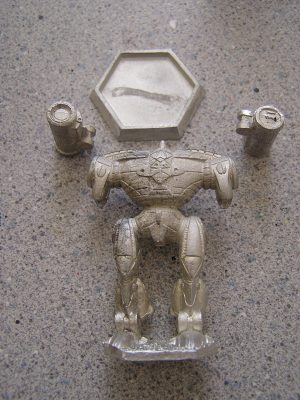
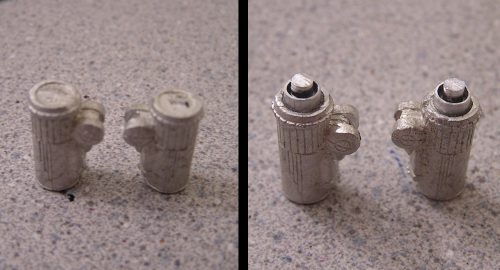
I decided to do some modifications to this mini. First, I decided to make the arms a little bit more fancy. The stock pieces are flat on both the front and the back, and it is difficult to imagine them as guns. I added some detail on the back to give the impression of a breach mechanism. Using a fine saw, I cut a section of solid aluminum rod and a larger aluminum pipe for each side, and glued them to the back of the arms.
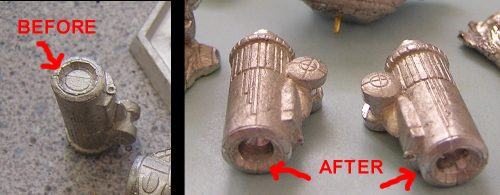
For how big around the guns are, the barrel is not sculpted very deep. To help preserve the illusion of depth, I bored out the barrels with a power drill. It's not important to make it particularly deep to get the effect, and I went about 1/8 inch.
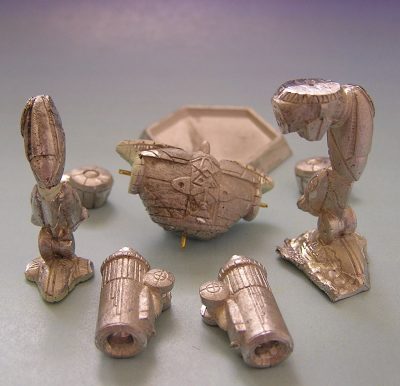
I also wanted to give my mini more life by showing it in a walking pose. To do this, it was necessary to remove the upper arms at the shoulder, remove the right leg at the hip, cut the right foot from the base, and to cut the mini apart at the waist. I made these cuts with a jeweler's saw. Note that for the shoulders, I had to make a compound cut due to the cowls that hang over the shoulder joints. Since the right leg was still straight, I cut the front of the knee almost all the way to the back and bent the knee to my desired pose. After filing all the cuts smooth, I used some sculpting materials to fill in for lost detail. I used a mix of two types of epoxy putty to get the material properties I wanted: Kneadatite (which is strong but flexible) and Milliput (which is hard but brittle). The resulting light-green mix is easy to sculpt and very durable. I used this mix to shore up the shoulder joints and right knee joint. I also used it to sculpt the bottom of the right foot. Here's what the unassembled mini looks like now.
Page 1: Starting1 | Page 2: Assembly | Page 3: Painting | Page 4: Nose Art | Page 5: Finishing