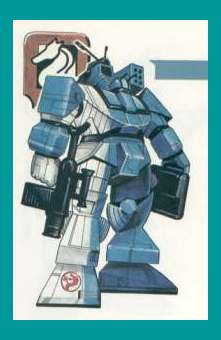
Here is a walkthrough of a simple drybrush scheme that looks pretty good. The paint scheme chosen here is the blue and white of the Lyran Guard, as shown in this picture from the long out-of-print Camo Specs book.
Both an Awesome and a Battlemaster are painted in this scheme, but we'll be focusing on the Awesome because there is more to do with this mini. Now, grab your painting supplies and let's get to it!
First, we have to get it ready for painting. Shown in the picture below is the original-casting Awesome, straight out of the package. Note the big chunk of metal holding the arms together, and the excess metal mold lines on the arms and body.
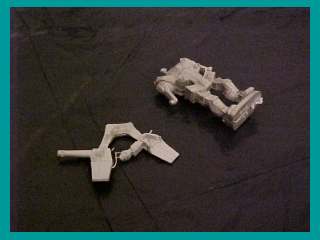
Use a hobby knife to carefully cut these excess pieces of metal off. Sand your cuts smooth with either a file or sandpaper (small hobby-sized file or sandpaper recommended).
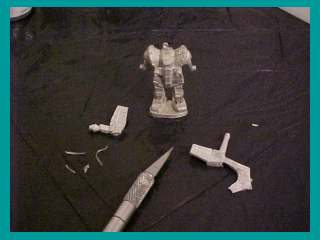
Next, assemble the mini and place on a hex base. I used epoxy here, because once you are good with epoxy there is no stronger glue. With any of the model glues (epoxy, Weld-It, superglue), make sure you read the instructions for using that glue on metal. I MEAN IT! If you treat these special glues like Elmer's White Glue, they WILL NOT STICK! For the hex base shown here, I've made a hexagonal-shaped ceramic sculpture.

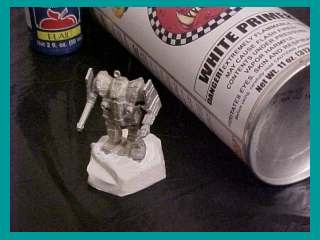
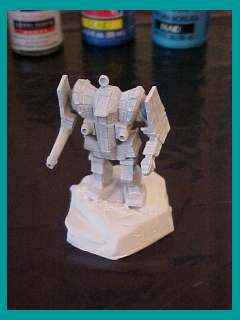
Once the glue is dry, it's time to primer your mech. This step helps to make sure the paint bonds to the metal. I usually prefer gray primer by Armory, but today I'm using white primer by Citadel. Always use spray primer, and always follow the directions on the can. If you spray the primer too thick, you'll lose the detail of the mini and you might as well be painting a rock.
Page 1: Starting | Page 2: Painting | Page 3: Finishing