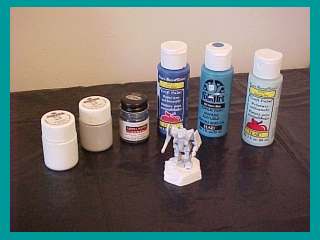
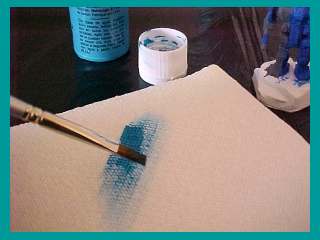
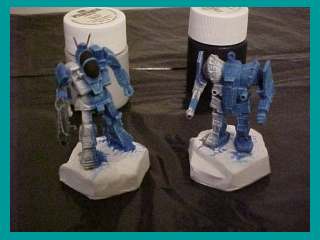
Next, make sure you have all the paints you need. Many different brands can work, but do not get thick enamels or any other paint that will hide detail. To do this drybrushing scheme, we'll need 3 shades of each white and blue. For this mini, I am using (from left to right): Ral Partha "White", Ral Partha "Gray", Testors Model Master Acryl "Intermediate Blue", Apple Barrel Colors "Too Blue", Folk Art "Azure Blue", and Apple Barrel Colors "Spring Sky". Note that "Intermediate Blue" is my dark gray, and it is not really a blue at all.
|
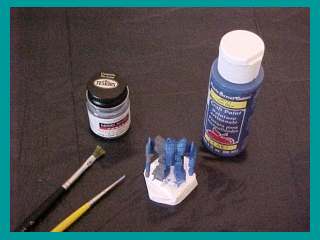
Start by painting the darkest shades where they go. Don't get in a hurry... it may need several coats, so do not put the paint on too thick. For this step, I did most of the painting with a #3 flat brush (the black one) , and cleaned up the borders between the colors with a 000 brush (the yellow one). By the time you get done with this step there should be no primer left showing on the mini (other than on the hex base).
|
|
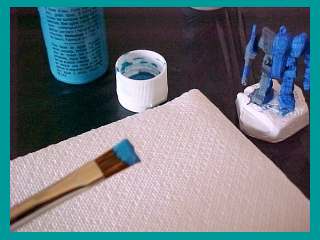
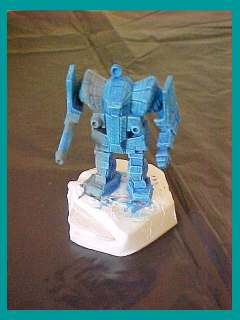
| Now it's time to start drybrushing. Do the darker color first (blue before white), and when doing each color go from darker shade to lighter shade (ie, add medium blue and then light blue to the dark blue coat you put on n the previous step). The object of drybrushing is to put color only on the raised surfaces of the mini, letting the lower surfaces retain the darker colors for a realistic look. Start by getting a big brush (I used a #8 flat here). Get a big nasty glop of paint on it. |
|
|
| Now, wipe off most of that paint on a paper towel. When all the liquid part of the paint is gone, there will be some chalky hue left on the brush. Now, paint all over the blue parts of the mini. Use a kind of gentle brushing stroke here, and don't try too hard to get paint in all the cracks (since that would defeat the purpose of drybrushing). When no more color comes off the brush, add more paint and wipe off on the paper towel again. You should only need to reload the brush 2-4 times to do the whole mini. |
|
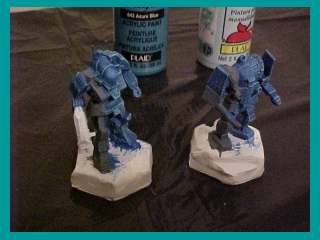
Once all of the dark blue parts have been highlighted with the medium blue, get out the light blue and repeat.

|
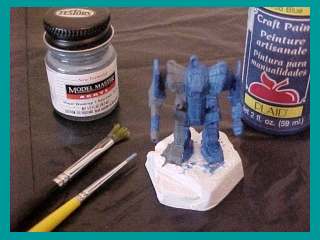
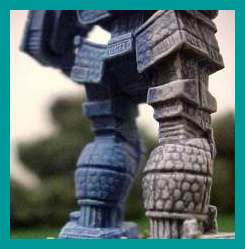
Now, all of the blue parts should have 3 layers of color, and the highest ridges should be very light and the crevices very dark. Here's a close-up of the Awesome, and the first appearance of the Battlemaster.
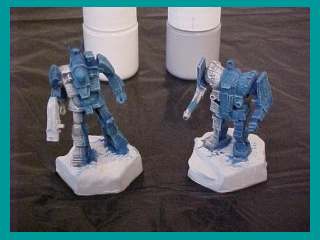
Next, repeat the drybrushing steps with the lighter color. Use the gray then the white to do the white portion. The drybrushing is now done, and your miniature ought to be looking pretty good. Because drybrushing occurs best with a big brush, the intersection between areas of color may not be crisp. With practice, you can get it to look pretty good. Avoid the temptation to touch it up with a normal paint brush after you've started drybrushing. It's easy to ruin the effect this way.
|
|
Paint the details of the mechs. Cockpits are good in black or silver, gun ports look good in black or dark gray. I've painted the canopy of these mechs black. I painted the Battlemaster's gun black, then lightly drybrushed some gray on it to give more detail.
|