Now, on to the painting. The paintjob for this mech will be done using a technique called "blending". There are several different ways to do it, but the idea is that you use successive thin coats of paint to build up the shadows and highlights you want. To avoid chunky paint buildup on your mini, you'll need to thin the paint. The best way to do this is to make and use small amounts at a time. I mix a couple drops of paint with a drop of DecoArt Brush and Blend Extender and a little water. I have a lot of disposable palettes for this sort of work; for a while AOL would send me a new palette every week.
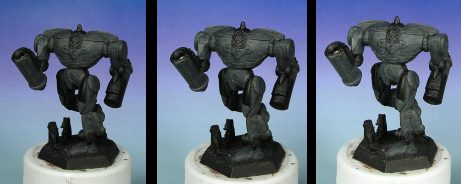
The base color of the scheme will be gray. I start with a base of VMC Gray Green, apply a few coats of that, and slowly add in some VMC Dark Sea Gray as more coats get applied. The gray for this mini was done in about 10 coats, with the final few being pure Dark Sea Gray. Below are pics from the first few coats.
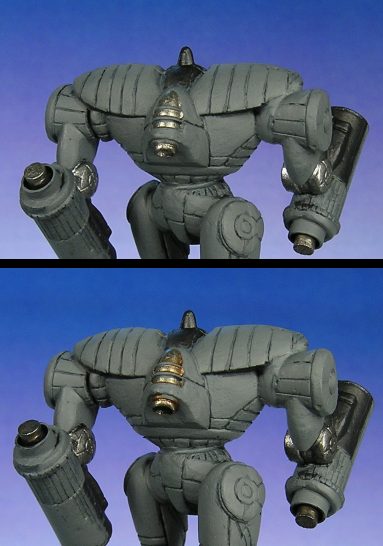
When I work on a project like this, I like to do various steps "out of order". That is, before doing the final coats of gray, I moved on to other things. Next, I did some of the metallic work. I did the joints and gun barrels with layers of GW Boltgun Metal and Chainmail. In between coats I applied a wash of black ink to give depth to the details. I did the rear jet and bottom of the foot with mixes of GW Mithril Silver and VMC Bronze. The wash for this was done with a mix of Black and Flesh inks.
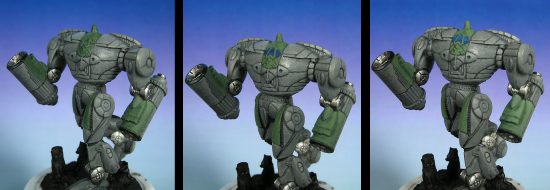
On to the greens. To give the paint scheme the feel of a WW2 bomber, I decided to use greens near the cockpit and on the tops of other surfaces. Following the same idea as the gray, I applied successive coats of thinned down greens. I started with a base of RMS Muddy Olive, mixed in some RMS Olive Green, and ended with a mix of 2:1 Olive:Muddy. The green is much more opaque, so I only used about 7 coats.
Page 1: Starting | Page 2: Assembly | Page 3: Painting | Page 4: Nose Art | Page 5: Finishing